2. Build Your First RAG System from Scratch
Strip away every framework and build RAG with raw Python — numpy cosine similarity, direct OpenAI calls, no LangChain. Understand exactly what the abstractions hide before you use them.

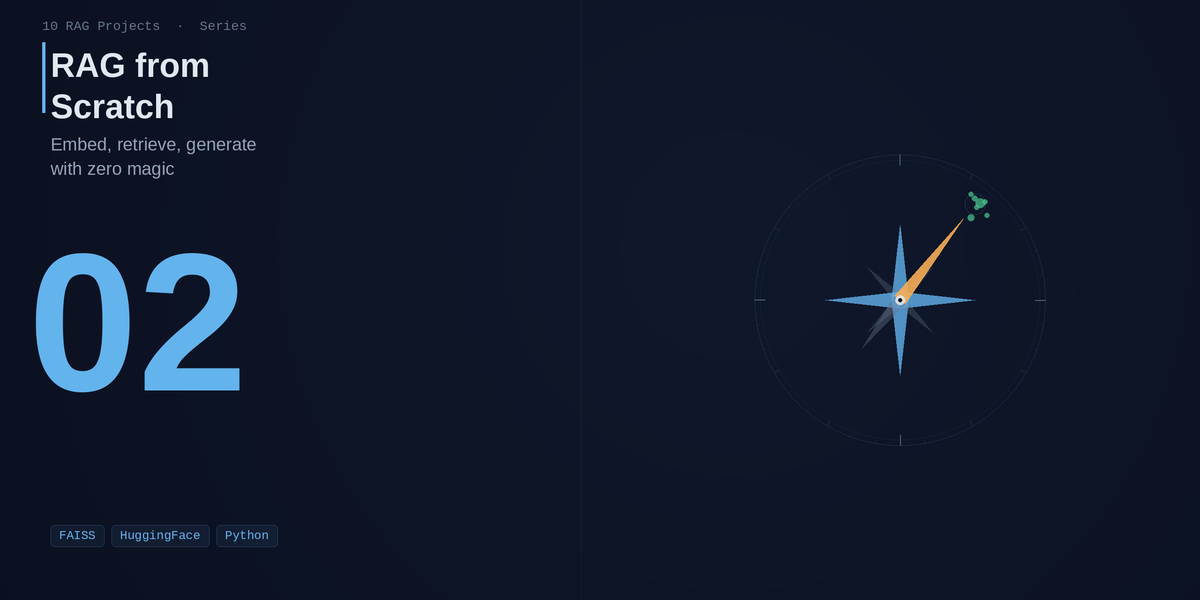
Build Your First RAG
from Scratch
Demystify retrieval-augmented generation by building it in raw Python first - no framework, just NumPy and FAISS - then refactor to LangChain LCEL to see exactly what the abstraction buys you.
🔍Why Build Without the Framework?
In Article 1, we built a complete RAG pipeline using LangChain and ChromaDB. It worked well - but if you have ever stared at a LangChain chain and wondered what is actually happening inside that pipe operator, this article is for you.
The goal is not to avoid frameworks. The goal is to reach the point where, when you use a framework, every line of its code makes sense to you. There is a specific moment when this clicks: you have built the thing yourself, and then you see how the framework collapses five files into three lines. From that moment on, you know exactly what to reach for when the framework breaks.
This article builds the same pipeline twice. The first time, every piece is explicit Python code - a custom chunker, direct sentence-transformers calls, NumPy matrix operations for cosine similarity, FAISS index management, and raw OpenAI SDK calls. The second time, we replace those ~200 lines with a 12-line LCEL chain. Same inputs, same outputs, identical behaviour.
By the end you will understand: what cosine similarity is (not just how to call it), why FAISS IndexFlatIP is appropriate for normalised embeddings, what each LangChain component actually does at the Python level, and when to use FAISS versus ChromaDB.
🏗️Two Pipelines, One Goal
Both pipelines perform the same two operations: ingestion (turning a text file into a searchable index) and querying (retrieving relevant passages and generating a grounded answer). The difference is entirely in how much of the plumbing is explicit Python versus framework convention.
The raw pipeline implements every arrow in those diagrams as an explicit Python function. The LCEL pipeline implements the same arrows using LangChain's pipe operator - each | character is one of those arrows.
Both pipelines share the same RAGResponse Pydantic model as their return type. This means they are drop-in replacements for each other - the compare CLI command can run both and display results side-by-side because they speak the same interface.
🧰Technology Stack
Every library is pinned. Every version was tested together. The stack is deliberately minimal - no database server, no API server, no Docker container.
FAISS 1.8.0
Facebook AI Similarity Search. Exact nearest-neighbour on CPU. IndexFlatIP performs exhaustive inner-product search - perfect for normalised embeddings up to ~1M vectors.
sentence-transformers 3.3.1
Used directly - not via LangChain - in the raw pipeline. all-MiniLM-L6-v2 produces 384-dimensional embeddings in under 5ms per chunk on CPU.
NumPy 1.26.4
Matrix operations for the manual cosine similarity implementation. The key insight: for unit vectors, matrix @ query_vec produces cosine scores directly.
LangChain 0.3.13
Used only in the LCEL pipeline. Provides RecursiveCharacterTextSplitter, HuggingFaceEmbeddings, FAISS wrapper, ChatOpenAI, and the pipe-syntax chain builder.
Pydantic v2 (2.10.3)
DocumentChunk, EmbeddedChunk, RetrievedChunk, RAGResponse, IndexMetadata - all frozen models with field validators. Shared by both pipelines.
OpenAI SDK 1.58.1
Used directly (no LangChain wrapper) in the raw pipeline. The Ollama OpenAI-compatible endpoint is also supported - set LLM_PROVIDER=ollama to run fully local.
Install everything at once:
# Create and activate a virtual environment
python3.11 -m venv .venv
source .venv/bin/activate   # Windows: .venv\Scripts\activate

# Install pinned dependencies
pip install -r requirements.txt

# Copy env template and fill in your API key
cp env.example .env
nano .env                   # or: echo "OPENAI_API_KEY=sk-..." >> .env
requirements.txt pins torch==2.5.1 (CPU build). If you have a CUDA GPU, replace it with torch==2.5.1+cu121 from the PyTorch index. Embedding time drops from ~5ms to ~0.8ms per batch - significant for large corpora, irrelevant for this tutorial.
📐Embeddings from First Principles
Before writing a line of code, it is worth understanding exactly what an embedding is and why cosine similarity works. Most tutorials skip this, which is why most developers can use embeddings but cannot reason about them when something goes wrong.
What is an embedding?
An embedding model is a function that maps any text string to a fixed-length vector of floating-point numbers. The all-MiniLM-L6-v2 model produces vectors of length 384. The key property - the property that makes embeddings useful - is that semantically similar texts produce geometrically similar vectors.
Two sentences about the same topic will produce vectors that point in roughly the same direction in 384-dimensional space. Two sentences about completely different topics will produce vectors that point in orthogonal or opposite directions.
Cosine similarity as dot product
Cosine similarity measures the angle between two vectors, ignoring their magnitude:
The result ranges from −1 (opposite directions) to +1 (identical direction). For text embeddings, scores are typically in [0.2, 0.9] - you rarely see negative values because text embeddings do not span the full vector space symmetrically.
Here is the critical insight that makes our implementation efficient: if we normalise all vectors to unit length before storing them (so ||a|| = ||b|| = 1), the formula simplifies to just the dot product:
This is why we set normalize_embeddings=True in the sentence-transformers call, and why we use FAISS IndexFlatIP (inner product = dot product) rather than IndexFlatL2 (Euclidean distance). For normalised vectors, inner product search IS cosine similarity search.
import numpy as np
from sentence_transformers import SentenceTransformer

def embed_texts(texts: list[str]) -> np.ndarray:
    """Return L2-normalised float32 matrix, shape (N, 384)."""
    model = SentenceTransformer("sentence-transformers/all-MiniLM-L6-v2")
    return model.encode(
        texts,
        normalize_embeddings=True,  # ||v|| = 1 for every row
        convert_to_numpy=True,
    ).astype(np.float32)

def cosine_similarity_matrix(query_vec: np.ndarray, corpus: np.ndarray) -> np.ndarray:
    """
    For unit vectors: inner product == cosine similarity.
    corpus @ query_vec multiplies each row of corpus by query_vec.
    Result shape: (N,) - one score per corpus chunk.
    """
    scores = corpus @ query_vec     # (N, 384) @ (384,) → (N,)
    return np.clip(scores, 0.0, 1.0)  # clamp float precision drift
This is the entire cosine similarity implementation. Three lines of NumPy. The complexity people associate with "vector search" is all in efficiently indexing millions of vectors - at the scale of one document (hundreds of chunks), brute-force matrix multiplication on CPU completes in under a millisecond.
Why 384 dimensions?
The all-MiniLM-L6-v2 model was designed for sentence-level semantic similarity. Its 384-dimensional output is a deliberate trade-off: large enough to capture rich semantic meaning, small enough to be fast on CPU and memory-efficient at scale. A 1,000-chunk corpus occupies just 1000 × 384 × 4 bytes = 1.5 MB of RAM as a NumPy matrix.
Both the raw pipeline and the LCEL pipeline use exactly the same model (all-MiniLM-L6-v2), with normalize_embeddings=True in both cases. This is not a coincidence - you must use the same model at ingestion time and at query time. If you swap the model, all stored vectors become invalid and you must re-embed everything.
🔧Phase 1 - The Raw Python Pipeline
We build the pipeline bottom-up: chunker → embedder → FAISS store → LLM caller → full pipeline class. Each component is a standalone Python file with no LangChain imports.
Step 1: The Chunker
The chunker in chunker.py does one thing: split a large text into smaller overlapping pieces. The algorithm is sentence-aware: it splits on sentence endings (.!?) to avoid cutting a thought mid-sentence, then accumulates sentences until the character budget is exhausted, then carries forward an overlap window so adjacent chunks share context.
import re
from models import DocumentChunk

def chunk_text(
    text: str, source: str,
    chunk_size: int = 512,
    chunk_overlap: int = 64,
) -> list[DocumentChunk]:

    sentences = re.split(r'(?<=[.!?])\s+', text.strip())
    chunks, current, current_len, chunk_index = [], [], 0, 0

    def _flush():
        nonlocal current, current_len, chunk_index
        raw = " ".join(current).strip()
        if len(raw.split()) >= 5:
            chunks.append(DocumentChunk.create(raw, source, chunk_index))
            chunk_index += 1
        # Carry forward overlap: keep last N chars of sentences
        overlap_buf, overlap_len = [], 0
        for sent in reversed(current):
            if overlap_len + len(sent) + 1 <= chunk_overlap:
                overlap_buf.insert(0, sent)
                overlap_len += len(sent) + 1
            else: break
        current[:] = overlap_buf
        current_len = overlap_len

    for sentence in sentences:
        if current and current_len + len(sentence) > chunk_size:
            _flush()
        current.append(sentence)
        current_len += len(sentence) + 1

    if current:
        raw = " ".join(current).strip()
        if len(raw.split()) >= 5:
            chunks.append(DocumentChunk.create(raw, source, chunk_index))
    return chunks
The DocumentChunk.create() factory generates a deterministic 16-character hex ID from a SHA-256 hash of source:chunk_index:text[:64]. This means re-ingesting the same document produces identical IDs - useful for detecting and skipping duplicates.
Step 2: The Embedder
The embedder in embedder.py wraps a singleton SentenceTransformer instance (loaded once, reused across calls) and exposes two functions: embed_texts() for raw strings and embed_chunks() for DocumentChunk objects.
_model: SentenceTransformer | None = None

def get_model() -> SentenceTransformer:
    global _model
    if _model is None:
        logger.info("Loading embedding model: %s", MODEL_NAME)
        _model = SentenceTransformer(MODEL_NAME)
    return _model  # ~400 MB model, loaded once per process

def embed_chunks(chunks: list[DocumentChunk]) -> list[EmbeddedChunk]:
    texts = [c.text for c in chunks]
    matrix = embed_texts(texts)      # shape (N, 384), normalised
    return [
        EmbeddedChunk(chunk=chunk, embedding=matrix[i].tolist())
        for i, chunk in enumerate(chunks)
    ]
The singleton pattern is important here. Loading the all-MiniLM-L6-v2 model from disk takes about 800ms and allocates ~400 MB of RAM. If get_model() created a new instance on every call, embedding 200 chunks would require 200 model loads - an 160-second overhead versus a few seconds with the singleton.
Step 3: FAISS Index Wrapper
The FAISSStore class in faiss_store.py wraps three FAISS operations: add() (insert normalised vectors), search() (embed a query string and retrieve top-k), and save/load persistence.
def search(self, query: str, k: int = 4) -> list[RetrievedChunk]:
    if self.index.ntotal == 0:
        return []

    query_vec = embed_texts([query])          # (1, 384)
    faiss.normalize_L2(query_vec)             # safety: double-normalise
    n = min(k, self.index.ntotal)
    distances, indices = self.index.search(query_vec, n)

    results = []
    for rank, (dist, idx) in enumerate(zip(distances[0], indices[0]), start=1):
        if idx == -1:   # FAISS pads with -1 when ntotal < k
            continue
        results.append(RetrievedChunk(
            chunk=self.chunks[idx],
            score=float(np.clip(dist, 0.0, 1.0)),
            rank=rank,
        ))
    return results
Notice faiss.normalize_L2(query_vec) - we call this even though embed_texts() already normalises. This is a defensive pattern: if the query vector arrives from any other source, or if floating-point operations have introduced drift, we ensure it is unit-length before the inner-product search. The cost is negligible (one division per 384 floats).
Step 4: Direct LLM Call
The raw pipeline calls the LLM directly using the OpenAI Python SDK - no LangChain involved. The function is intentionally small: format a prompt, call the API, return the string.
_RAW_PROMPT = """\
You are a precise technical assistant.
Answer the question using ONLY the context passages below.
If the answer is not found in the context, respond with exactly:
  "I don't know based on the provided context."

Context:
{context}

Question: {question}

Answer:"""

def _call_llm_direct(prompt: str) -> str:
    import openai
    client = openai.OpenAI(api_key=os.environ["OPENAI_API_KEY"])
    response = client.chat.completions.create(
        model="gpt-4o-mini",
        messages=[{"role": "user", "content": prompt}],
        temperature=0,
        max_tokens=1024,
    )
    return response.choices[0].message.content or ""
Step 5: The Complete Raw Pipeline
With those four components in place, the RawRAGPipeline class in rag_raw.py composes them into ingestion and query methods. Every step is an explicit function call - there is no framework magic:
def query(self, question: str, k: int = 4) -> RAGResponse:
    self._ensure_loaded()

    # Step 1: embed question + FAISS inner-product search
    results = self._store.search(question, k=k)

    # Step 2: format retrieved passages as numbered context block
    context = "\n\n---\n\n".join(
        f"[Passage {r.rank} | similarity={r.score:.3f}]\n{r.chunk.text}"
        for r in results
    )

    # Step 3: inject context into prompt template and call LLM
    prompt = _RAW_PROMPT.format(context=context, question=question)
    answer = _call_llm_direct(prompt)

    # Step 4: wrap result in Pydantic model
    return RAGResponse(
        question=question,
        answer=answer,
        sources=list({r.chunk.source for r in results}),
        chunk_ids=[r.chunk.chunk_id for r in results],
        confidence_note=f"Top similarity: {results[0].score:.3f}",
        retrieved_chunks=len(results),
        pipeline="raw",
    )
Run it:
# Index your document
python cli.py ingest my_document.txt

# Query using the raw pipeline
python cli.py ask-raw my_document.txt "What is the main conclusion?"

# Output includes pipeline="raw" and source chunk IDs
⚡Phase 2 - FAISS Deep Dive
FAISS is a library for efficient similarity search over dense vectors. It was built at Meta AI Research and is the most widely deployed vector search library in production AI systems. Understanding its index types is essential for scaling beyond prototype size.
Index types and when to use them
| Index Type | Search Method | Memory | Accuracy | Use When |
|---|---|---|---|---|
| IndexFlatIP | Exact - brute force inner product | 4 bytes × D × N | 100% | N < 100K vectors (this article) |
| IndexFlatL2 | Exact - brute force Euclidean distance | 4 bytes × D × N | 100% | N < 100K, non-normalised vectors |
| IndexIVFFlat | Approximate - inverted file + flat scan | Slightly larger than Flat | 95-99% | 100K-10M vectors, fast queries needed |
| IndexHNSWFlat | Approximate - Hierarchical NSW graph | ~6× larger than Flat | 99%+ | 10M+ vectors, latency-critical queries |
| IndexIVFPQ | Approximate - IVF + Product Quantisation | 8-32× smaller than Flat | 90-95% | Billion-scale, RAM-constrained |
For this article's use case - one document, hundreds to low thousands of chunks - IndexFlatIP is the correct choice. It is exact (100% recall), straightforward to understand, requires no training step, and the brute-force search over 1,000 × 384-float vectors completes in under 2ms on any modern CPU.
If you decide to use IndexIVFFlat for larger corpora, you must call index.train(matrix) with a representative sample of your vectors before you can call index.add(). Skipping this step causes a silent failure in older FAISS versions and a crash in newer ones. The flat indexes (IndexFlatIP, IndexFlatL2) require no training and are always add-ready.
Why IndexFlatIP instead of IndexFlatL2?
Both are exact brute-force searches. The difference is the distance metric:
- → Computes inner product (dot product) between query and each stored vector
- → For unit vectors: inner product = cosine similarity
- → Returns scores in [0, 1] - higher is more similar
- → Use this when
normalize_embeddings=True
- → Computes squared Euclidean distance between query and each stored vector
- → Returns distances - lower is more similar (opposite of IP)
- → Convert to similarity:
cosine = 1 - (l2_dist / 2) - → LangChain's FAISS wrapper uses this internally
LangChain's FAISS wrapper uses IndexFlatL2 by default and handles the distance-to-similarity conversion internally. Our raw pipeline uses IndexFlatIP and avoids that conversion entirely by requiring unit vectors - a simpler mental model.
Persistence: how it works
FAISS provides faiss.write_index() and faiss.read_index() for serialising the index to and from disk. However, FAISS only knows about vectors - it has no concept of metadata (source file, chunk text, page numbers). We therefore persist three files together:
pickle file containing a list[DocumentChunk] in insertion order. The n-th element of this list is the chunk that corresponds to FAISS vector index n.IndexMetadata JSON file recording how the index was built: embedding model, chunk size, overlap, total chunk count, creation timestamp.When FAISS returns indices = [42, 17, 8, 91] for a query, we look up chunks[42], chunks[17], etc. to get the actual text. The index in the list is the bridge between FAISS vector space and our application data.
The chunks.pkl file uses Python's pickle protocol, which can execute arbitrary code on load. Only load FAISS stores that you created yourself, from trusted locations. The LangChain FAISS wrapper surfaces this with the allow_dangerous_deserialization=True flag - an explicit acknowledgment that you understand the risk.
🔗Phase 3 - Refactor to LangChain LCEL
Now that every step of the raw pipeline is clear, we rebuild the same pipeline using LangChain LCEL. The purpose is not to show that LCEL is better - it is to make the mapping between the raw code and the framework code explicit, so you can read LCEL chains fluently.
What LCEL replaces
- ✗
chunker.py- custom sentence splitter - ✗
embedder.py- SentenceTransformer singleton + NumPy cosine - ✗
faiss_store.py- FAISSStore class, add/search/save/load - ✗
_call_llm_direct()- OpenAI SDK call - ✗
_build_context()- manual context formatter - ✗
_RAW_PROMPT- plain string template
- ✓
RecursiveCharacterTextSplitter - ✓
HuggingFaceEmbeddings(wraps sentence-transformers) - ✓
LangChainFAISS.from_documents()+as_retriever() - ✓
ChatOpenAI(model="gpt-4o-mini", temperature=0) - ✓
RunnableLambda(_format_docs) - ✓
ChatPromptTemplate.from_template()
The LCEL query chain
Here is the complete LCEL query pipeline - eleven lines including blank lines:
def query(self, question: str, k: int = 4) -> RAGResponse:
    vs = self._load()
    retriever = vs.as_retriever(search_kwargs={"k": k})
    llm = _get_llm()

    # Each | connects one Runnable to the next - this IS the pipeline
    chain = (
        {
            "context":  retriever | RunnableLambda(_format_docs),
            "question": RunnablePassthrough(),
        }
        | _PROMPT
        | llm
        | StrOutputParser()
    )

    answer = chain.invoke(question)
    docs   = retriever.invoke(question)

    return RAGResponse(
        question=question, answer=answer,
        sources=list({d.metadata.get("source") for d in docs}),
        chunk_ids=[], confidence_note=f"{len(docs)} passages via LCEL",
        retrieved_chunks=len(docs), pipeline="lcel",
    )
Reading this chain left-to-right: the question string flows into a dict with two keys. For "context", it flows through the retriever (embed + FAISS search → list of Documents), then through _format_docs (list of Documents → formatted string). For "question", it passes through unchanged via RunnablePassthrough(). The dict is then injected into the prompt template, which produces a ChatPromptValue. That flows into the LLM, which returns a ChatMessage. That flows into StrOutputParser(), which extracts the string content.
Every step in that description corresponds to exactly one step in the raw pipeline. LCEL did not change the logic - it compressed the plumbing.
Running the comparison
# Run both pipelines on the same question
python cli.py compare my_document.txt "Summarise the key findings."

# Output: two panels side by side + metrics table
#   Raw Python  |  LCEL
#   The key...  |  The key...
# ─────────────────────────────────────────
#   Chunks/docs: 4      | 4
#   Top score:   0.847  | N/A (LCEL does not expose raw scores)
The raw pipeline returns chunk_ids and similarity score for every retrieved chunk - you can inspect exactly which pieces of text influenced the answer. The LCEL pipeline, by default, does not expose these details. For production debugging and answer attribution, this matters: the raw approach gives you a complete audit trail that LCEL requires extra wiring to replicate.
⚖️ChromaDB vs FAISS
Article 1 used ChromaDB as the vector store. This article uses FAISS. Both are correct choices - they have different strengths, and the right choice depends on your specific requirements.
| Dimension | ChromaDB (Article 1) | FAISS (This Article) |
|---|---|---|
| Backend | SQLite (embedded mode) or HTTP server | Pure in-memory binary, files for persistence |
| Metadata filtering | Yes - filter by page, source, custom fields | No - post-query filtering only |
| Persistence | Automatic - writes to disk on every add | Manual - call save() explicitly |
| Update/delete | Supported via collection ID | Not supported - rebuild index on changes |
| Scale (vectors) | Up to ~1M comfortably embedded | Flat: up to 1M; IVF/HNSW: billions |
| Dependencies | Python package only | Python + native C++ library (faiss-cpu/gpu) |
| LangChain integration | langchain-chroma | langchain-community FAISS wrapper |
| Index types | One (HNSW under the hood) | 20+ (Flat, IVF, HNSW, PQ, ScaNN, …) |
| MMR search | Native search_type="mmr" | Requires custom post-processing |
| Best for | Single-document RAG, prototypes, apps needing metadata filters | Multi-document corpora, scale benchmarks, production at 10M+ vectors |
The key practical difference is metadata filtering. In Article 1, we used ChromaDB's where={"page": 3} filter to restrict retrieval to specific pages. FAISS has no such concept - all filtering must happen after retrieval, which is less efficient when you only want results from a subset of the corpus.
For a single-document Q&A tool serving hundreds of users, ChromaDB's simplicity and built-in metadata filtering make it the better choice. For a multi-tenant system ingesting thousands of documents daily, FAISS's index variety and raw performance at scale tip the balance.
In both this article and Article 1, the vector store is isolated behind a thin abstraction (FAISSStore or ChromaDB's vectorstore object). The retrieval interface is always search(query, k) → list[RetrievedChunk]. This means you can swap ChromaDB for FAISS (or Pinecone, or Weaviate) without touching rag_raw.py or cli.py. Design your vector store as a replaceable component from the start.
🚀Production Decisions
Before deploying a RAG system, you will face a predictable set of design decisions. Here is how to reason about each one.
Common failure modes
all-MiniLM-L6-v2, then upgraded to bge-large-en-v1.5. Now queries return irrelevant chunks - the stored vectors are in a different vector space than your query vectors. There is no error; the system silently returns garbage.IndexMetadata (we do this). On load, assert that the model in metadata matches the model currently configured. Rebuild the index whenever you change models.gpt-4o-mini's 128k context window. At chunk_size=8192, you may create chunks of 1,500+ tokens that exceed retrieval assumptions downstream.tiktoken for OpenAI models to count tokens before splitting.SentenceTransformer(MODEL_NAME) on each request adds 800ms+ of cold-start latency and may OOM-kill the process if concurrent requests each try to load a 400MB model.get_model() function) or a dependency-injection pattern (FastAPI's lifespan event) to load the model once at startup. In containerised deployments, pre-warm the model in the container's startup probe rather than on first request.Production decision tree
IndexFlatIP (exact, simple, fast). 500K-10M → IndexIVFFlat (requires training step; use nlist=4096). 10M+ → IndexHNSWFlat or IndexIVFPQ (latency vs RAM trade-off).You now understand what the framework abstracts.
You have built a complete RAG system twice: once in 200 lines of raw Python where every step is explicit, and once in 35 lines of LangChain LCEL where the framework handles the plumbing. The logic is identical. The difference is visibility versus brevity.
The next article in the series applies these foundations to a multi-tenant scenario - multiple documents, isolated namespaces, per-user retrieval quotas, and a FastAPI backend. The vector store management patterns you learned here become the foundation for that architecture.
→ Article 3: Multi-Tenant RAG API with FastAPI